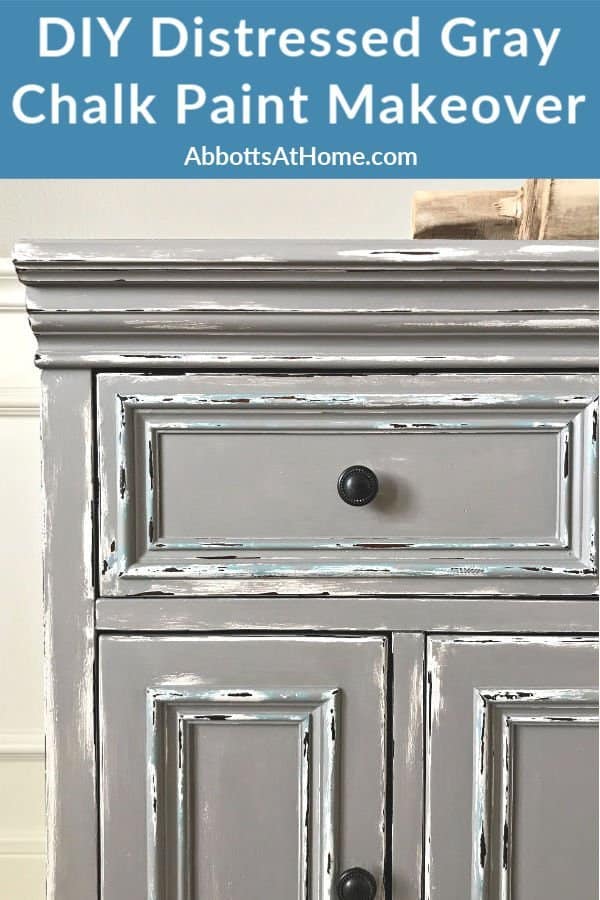
When it comes to giving furniture a vintage, distressed look, chalk paint is a popular choice for many DIY enthusiasts. Not only does it provide a unique, matte finish, but it also allows for easy distressing to achieve that shabby-chic aesthetic. In this article, I will guide you through the process of how to distress furniture with chalk paint, from choosing the right furniture to sealing the final distressed finish.
Choosing the right furniture for distressing
Wooden furniture
When distressing furniture with chalk paint, it’s important to choose pieces that are made of wood. Chalk paint adheres well to wood surfaces and allows for easy distressing without damaging the material. Look for solid wood furniture such as dressers, tables, or chairs for the best results.
Furniture with a smooth finish
Smooth-finished furniture provides the ideal canvas for distressing with chalk paint. Avoid pieces with intricate carvings or details, as these can make the distressing process more challenging. Opt for furniture with simple, clean lines and minimal embellishments for a smoother distressing experience.
Preparing the furniture for distressing

Cleaning the surface
Before applying chalk paint, it’s crucial to clean the furniture surface thoroughly. Use a mild soap and water solution to remove any dirt, dust, or grime. Allow the furniture to dry completely before proceeding to the next step.
Sanding the furniture
For a smooth and even finish, lightly sand the furniture surface with fine-grit sandpaper. This step helps to create a better bond between the chalk paint and the furniture, ensuring long-lasting results. After sanding, wipe down the furniture with a tack cloth to remove any residual dust.
Applying the chalk paint
Choosing the right color of chalk paint
Chalk paint comes in a variety of colors, allowing you to customize the look of your distressed furniture. Whether you prefer a soft, pastel hue or a bold, vibrant shade, choose a chalk paint color that complements your existing decor or adds a pop of personality to the room.
Applying the first coat
Using a high-quality paintbrush or roller, apply the first coat of chalk paint to the furniture surface. Work in long, even strokes, ensuring full coverage and a smooth finish. Allow the first coat to dry completely before applying the second coat.
Applying the second coat
Once the first coat is dry, apply a second coat of chalk paint to the furniture. This additional layer helps to enhance the color and coverage, creating a more opaque finish. Take your time to ensure even application, and allow the second coat to dry thoroughly before moving on to the distressing process.
Distressing the furniture
Using sandpaper to distress the edges
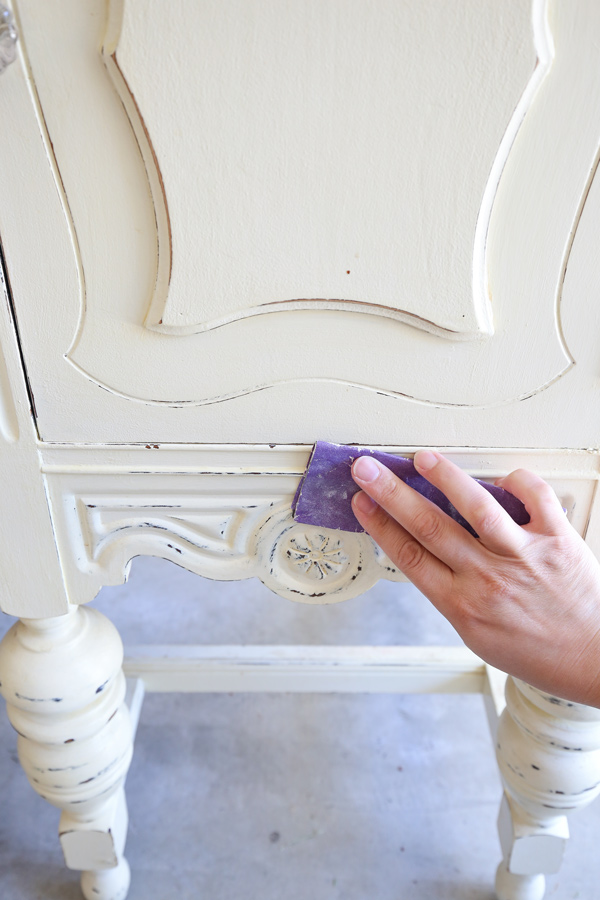
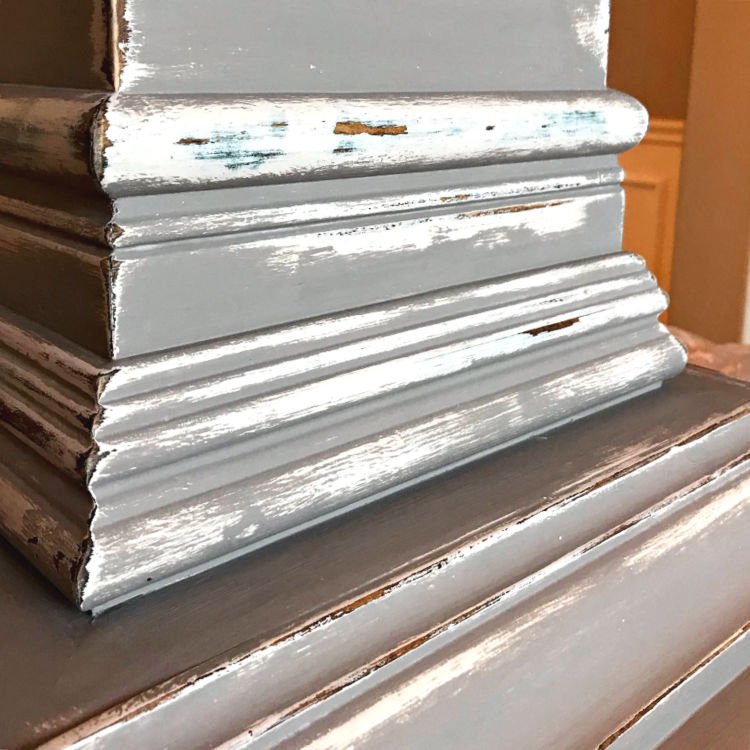
To achieve a distressed look, gently sand the edges and corners of the furniture with medium-grit sandpaper. Focus on areas that would naturally wear over time, such as edges, handles, and raised details. This technique creates a weathered, vintage appearance, adding character to the piece.
Using a damp cloth to create a worn look
For a more subtle distressing effect, lightly dampen a cloth with water and gently rub it over the chalk paint surface. This technique softens the paint and creates a worn, aged look, mimicking the natural patina of aged furniture. Experiment with different pressure and motion to achieve the desired level of distressing.
Sealing the distressed furniture
Choosing the right sealant
Once the distressing process is complete, it’s essential to seal the chalk paint to protect the finish. Choose a clear wax or polyurethane sealant specifically designed for chalk paint to ensure durability and longevity. Consider the level of sheen and the application method when selecting the sealant for your distressed furniture.
Applying the sealant to protect the finish
Using a clean brush or cloth, apply the sealant to the distressed furniture in smooth, even strokes. Ensure complete coverage and pay special attention to areas that receive high traffic or use. Allow the sealant to dry according to the manufacturer’s instructions before using or displaying the distressed furniture.
Distressing furniture with chalk paint is a rewarding and creative way to transform ordinary pieces into unique, vintage-inspired treasures. With the right furniture, preparation, application, distressing techniques, and sealing, you can achieve a beautifully distressed finish that adds charm and character to your home decor.
FAQs
-
How long do you let chalk paint dry before distressing?
We recommend letting the first coat dry for at least 24 hours when you are using the wet-distressing technique. Make sure that your first coat of paint is properly cured so that it won’t come off when you distress it. Aug 19, 2023
-
Do you distress chalk paint before or after waxing?
Wax tends to hold in the dust from the sanding itself keeping an extremely limited amount of free-floating particulates in the air that would otherwise be all over the place if you distressed before you waxed. You have much more control over your distressing by doing it after you wax.
-
How do you antique furniture with chalk paint?
The secret is in working with Dark Chalk Paint® Wax. This will instantly age the paint, creating an authentic antique look. You can then use Clear Chalk Paint® Wax as a sort of magic eraser to wipe back any parts that appear too dark – creating exactly the right level of ageing to suit your style.
Originally posted 2023-04-15 03:32:17.