When it comes to giving your furniture a fresh new look, dyeing is a cost-effective and creative option. Whether you want to revamp an old piece or add a pop of color to a new one, dyeing furniture can completely transform its appearance. In this article, we will explore the step-by-step process of how to dye furniture, from choosing the right dye to finishing and sealing the dyed furniture.
Read on to learn how to dye furniture and give your home decor a personalized touch.
Choosing the right dye for your furniture

Understanding different types of furniture dyes
Before you start the dyeing process, it’s essential to understand the different types of furniture dyes available in the market. There are various options such as water-based dyes, oil-based dyes, and gel stains. Each type of dye has its own unique properties and application methods, so it’s important to choose the one that best suits your furniture and desired outcome.
Considerations for choosing the right dye
When selecting a dye for your furniture, consider factors such as the type of wood, the existing finish, and the desired color. For example, water-based dyes are ideal for lighter woods and provide vibrant colors, while oil-based dyes are better suited for darker woods and offer a rich, deep finish. Additionally, consider the level of transparency and coverage you want, as different dyes offer varying levels of opacity.
Preparing the furniture for dyeing

Cleaning the furniture
Before applying the dye, it’s crucial to clean the furniture thoroughly to remove any dirt, dust, or existing finishes. Use a mild wood cleaner and a soft cloth to wipe down the surface, ensuring that it is free from any debris that could affect the dye’s application and absorption.
Sanding the furniture
Once the furniture is clean, sanding the surface is essential to create a smooth and even base for the dye. Use fine-grit sandpaper to gently sand the entire piece, removing any imperfections, rough spots, or previous finishes. This step will also open up the wood’s pores, allowing the dye to penetrate evenly.
Applying a wood conditioner
After sanding, apply a wood conditioner to the furniture to ensure that the dye is absorbed uniformly. Wood conditioners help to prevent blotchiness and uneven color absorption, especially on porous woods such as pine or maple. Allow the conditioner to penetrate the wood for the recommended time before proceeding to apply the dye.
Applying the dye to the furniture
Choosing the right application method
When it comes to applying the dye, there are various methods to choose from, including brushing, wiping, or spraying. The application method will depend on the type of dye and the desired finish. For intricate details and crevices, a brush may be more suitable, while wiping or spraying can provide a more even coverage on larger surfaces.
Applying the dye evenly
Regardless of the application method, it’s crucial to apply the dye evenly to achieve a consistent and professional-looking finish. Work in small sections, ensuring that the dye is spread uniformly and that any excess is wiped away promptly. Pay attention to the wood’s grain and direction, as this can affect the dye’s absorption and final appearance.
Finishing and sealing the dyed furniture

Applying a clear coat finish
Once the dye has dried, applying a clear coat finish is essential to protect the dyed furniture and enhance its durability. Choose a clear coat that is compatible with the type of dye used, whether it’s water-based or oil-based, and apply it in thin, even layers. This will not only seal the dye but also provide a smooth and glossy surface.
Sealing the dye with a topcoat
To further enhance the longevity of the dyed furniture, consider applying a topcoat to seal in the dye and protect it from wear and tear. Topcoats come in various sheens, from matte to high-gloss, allowing you to customize the final appearance of the furniture. Apply the topcoat according to the manufacturer’s instructions, ensuring thorough coverage and even application.
Tips for maintaining dyed furniture
- Regularly dust and clean the dyed furniture to maintain its appearance and prevent dirt buildup.
- Avoid placing hot or wet items directly on the dyed surface to prevent damage and discoloration.
- Consider using furniture wax or polish to further protect and enhance the dyed finish.
By following these steps and tips, you can successfully dye your furniture and achieve a professional-looking finish that reflects your personal style. Whether you’re a DIY enthusiast or a homeowner looking to refresh your decor, dyeing furniture is a rewarding and creative project that can breathe new life into your living space.
FAQs
-
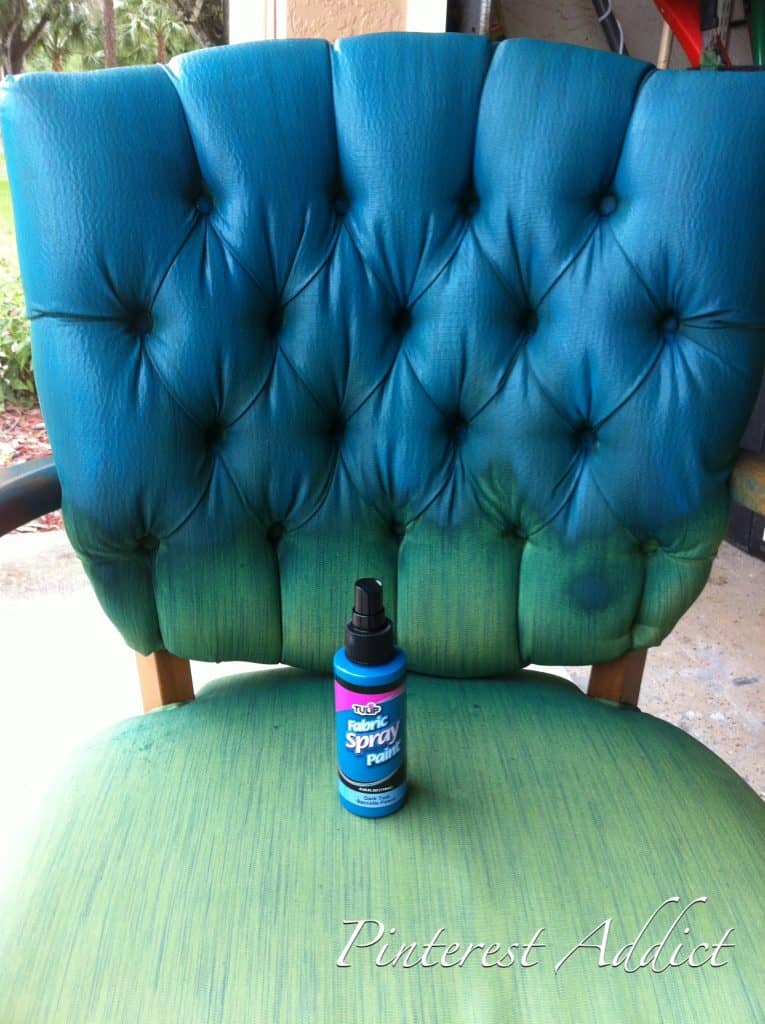
How can I change the color of my upholstery?
Once clean, dampen the fabric by spraying water on with a trigger spray bottle. Pour the paint into a bowl and dip in a sponge or paint brush. Rub this into the fabric and it will instantly soak in and change the colour. Leave to dry before applying a second coat of fabric paint in the exact same way as the first.
-
Can you paint or dye upholstery?
Yet with the right technique, just about any comfy textile-covered but not-so-fashionable chair, sofa, ottoman—you name it! —can take paint well without changing the original texture. The secret is in diluting the paint enough so that it functions more like dye.
-
Can you spray Rit dye on fabric?
Place fabric on baking rack with a tray under it. This is very important because it keeps the dye from puddling under the fabric. Squirt each dye color on fabric as desired. If you are trying to achieve sections of white space, purposely leave certain sections of the fabric white and undyed.
-
Can you brush on Rit dye?
These sneakers started out white and we dye-painted them with a sponge brush in some of our favorite Rit colors. This is so easy and the eyelet stitching on the canvas gives them a 2-tone look! Cover work area with a plastic table cover and have paper towels handy to protect against any possible spills.
Originally posted 2023-07-15 03:27:07.